Learn how to do your own wedding makeup step-by-step! Save money, stay in control, and feel confident on your big day with these easy beauty and makeup tips.
This post is all about how to do your own wedding makeup.
This post contains affiliate links, which means that I may receive a small commission if you purchase through them, at no extra cost to you.
Lately, we’ve been seeing a wave of modern brides choosing to do their own wedding makeup, and honestly, I see nothing wrong with that.
While hiring a makeup artist can be a great option (and definitely a time-saver), there’s something special about doing your own glam, especially when no one knows your face, style, and preferences quite like you do.
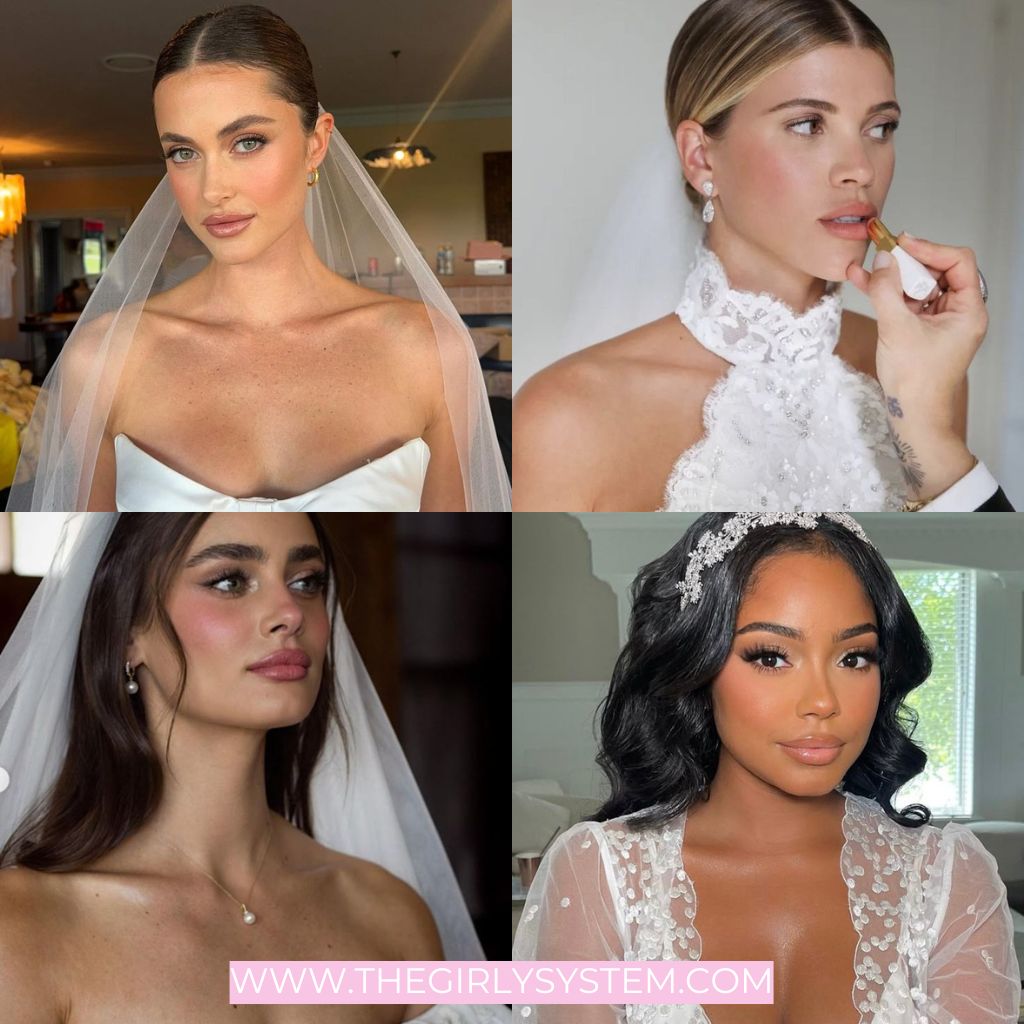
Feeling your best should be a non-negotiable every day, but especially on your wedding day. Whether you’re saying “I do” on a sunny beach at noon or beneath a sky full of stars, your makeup should reflect your natural beauty and make you feel confident walking down the aisle.
The key is to keep things simple. You want a look that enhances, not hides, your features. Not too much, not too little,just right.
That’s why in this post, I’m sharing 27 helpful tips to guide you through doing your own wedding makeup, so you can skip the stress and focus on feeling like you on your big day.

How to Do Your Own Wedding Makeup
1. Schedule a Facial, but Not Last-minute
If you plan to get a facial, make it at least two weeks before your wedding to avoid any post-treatment breakouts or sensitivity.
2. Breakout-prone? See a Derm in Advance
If you have acne-prone or sensitive skin, consult a dermatologist 3–4 months ahead so you can treat and calm your skin before the big day.
3. Hydration is a Game-Changer
Drink lots of water in the weeks leading up to the wedding.
It helps your skin look plump and glowy and flushes out toxins naturally.
Don’t forget to reach out more for hydrating foods and electrolytes.
4. Don’t Try Anything New The Week of
No new products, treatments, or tanning routines within 7 days of the wedding. Keep your routine familiar and safe.
5. Shape Your Brows 5–7 Days Ahead
Avoid plucking or waxing the day of, this can cause redness and irritation, and we don’t want that.
Consider brow lamination or tinting a week before for a polished look, and it really depends on your preferences.
6. Wear Your SPF
Use SPF 50+ daily and avoid tanning (or spray tans) last minute.
Burnt, peeling, or blotchy skin isn’t easy to fix with makeup.


7. Use Makeup You’ve Tested and Practiced With
Buy your products at least 2–3 months in advance, and practice multiple full-face looks with the same lighting you’ll have on the day.
8. Skin Prep Is Key
Start with a gentle exfoliator a few nights before.
On the day of, cleanse, moisturize, and use a primer based on your skin type, hydrating for dry skin and gripping for oily/combination.

9. Choose a Long-Wearing Foundation
Go for something transfer-proof and lightweight, like NARS Light Reflecting or Estée Lauder Double Wear.
Apply with a damp sponge or a brush for a flawless blend.
10. Skip Heavy Matte, Think Natural Glow
Use cream blush and contour, then lightly set with powder only in the T-zone to avoid looking cakey or too flat in photos.
11. Highlight Smartly
A touch of glow on your cheekbones, brow bones, and inner corners of your eyes is beautiful.
Avoid all-over shimmer, which can look greasy under flash.
12. Use Soft Shades
Think mauve, champagne, rose gold, peach, or taupe colors that bring dimension without looking harsh.
Avoid stark black or white eyeshadow.
13. Contour Your Eyes With Neutral Depth
Add a medium-to-deep neutral shade in the crease.
Smudge brown or soft grey shadow along the lash lines for definition.
14. Ditch White Liner, Go Nude
To open up the eyes naturally, use nude or peach eyeliner on the lower waterline instead of stark white.
15. Waterproof Everything
Use waterproof eyeliner and mascara, just in case emotions run high, or simply for humid and hot weather.
16. Lashes or No Lashes? You Decide
Go for natural-looking strip lashes or individual clusters for a fluttery effect.
Or skip them altogether and use a tubing mascara for length and smudge-proof wear.
17. Line and Fill with a Neutral Lip Liner
This keeps everything in place and makes your lipstick last longer.
18. Add a Lip Stain Base
Use a lip tint or stain first, so even if your lipstick fades, your lips stay naturally flushed.


19. Choose a Long-Wearing Lipstick
Matte liquid lips can be too drying, opt for satin, creamy mattes, or bullet formulas that wear beautifully and reapply well.
20. Apply powder between layers
Apply one coat, blot, then add a tiny bit of translucent powder, followed by another layer. This tip is crucial.
21. Go light on The Lip Liner
No harsh outlines, blend it in for a seamless finish, and double-check your teeth before you walk down the aisle!
These details often get overlooked, they really show up on camera.
22. Set Your Look Like a Pro
Use setting spray between each layer especially after finishing your makeup.
This is a tip that I swear by, and it never fails.
23. Keep a Touch-up Kit Handy
Have a bridesmaid or your purse nearby with pressed powder, blotting sheets, lipstick, and mascara for quick fixes.
24. Film > Flash? Test it all!
Record your trial makeup in different lighting (indoor, outdoor, flash) to make sure it looks great everywhere.
Modern cameras pick up everything, a well-blended, softly enhanced look is key.
25. Wear a Button-Down or Robe While Getting Ready
It prevents smudging your makeup when it’s time to change into your gown.
26. Use a Towel or Scarf When Slipping Into Your Dress
Protect that white fabric from a stray foundation!
27. Don’t Stress About Perfection
Confidence is the best finishing touch.
If something doesn’t go 100% as planned, you’re still the bride, and you’re still glowing.
This is everything for how to do your own wedding makeup.