The Curbless Shower Is Everywhere—18 Ideas to Get the Look Right
Curbless shower ideas go beyond pretty tile. Discover smart layouts, glass enclosures, shower niches, drains, benches, materials, and design details worth considering.
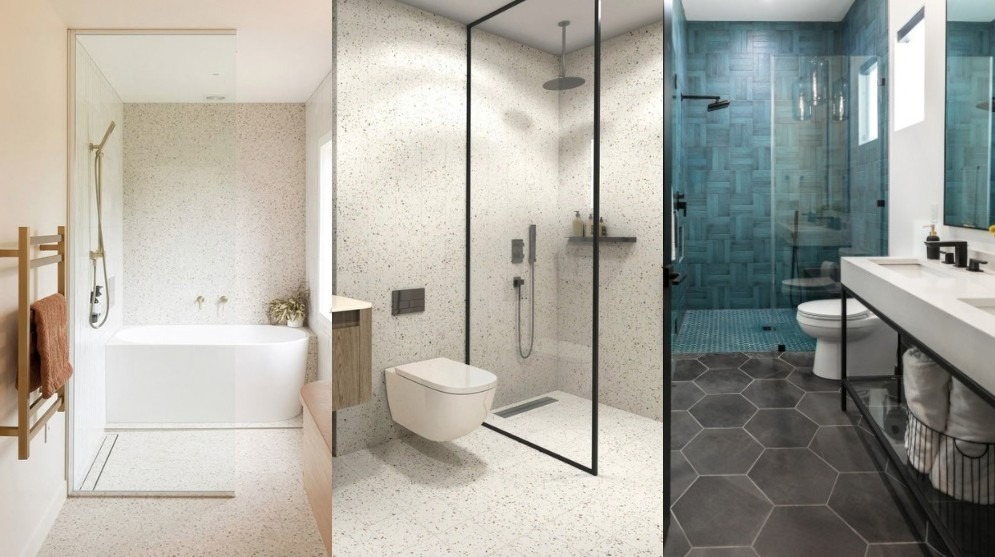
Walk through enough bathroom renovations right now, and you’ll notice the same detail coming up again and again: the shower curb is disappearing.
More homeowners are choosing curbless showers for the simple reason that they make a bathroom feel less divided. Instead of stepping over a raised edge and visually separating the shower from the rest of the room, the floor runs straight through, creating one continuous space. In a small bathroom, that can make a surprising difference. In a larger one, it gives the whole layout a more open, considered feel.
And I understand the appeal. There’s something particularly satisfying about a shower you can simply walk into, especially when the tile, glass, drain, and storage have all been planned around that idea.
But there’s a catch: a curbless shower is not just a regular shower with the little step removed. The floor needs to slope correctly, the drainage needs to be planned properly, waterproofing matters enormously, and the placement of the glass can determine whether water stays where it belongs.
That’s actually what makes these showers interesting to design. Once the curb disappears, the details become much more visible.
So if you’re considering one for your own bathroom, or you’re simply saving bathroom inspiration for the day you finally get around to that renovation, these are the curbless shower ideas I’d put on the shortlist.
Curbless Shower Ideas
1. Continue the bathroom floor into the shower
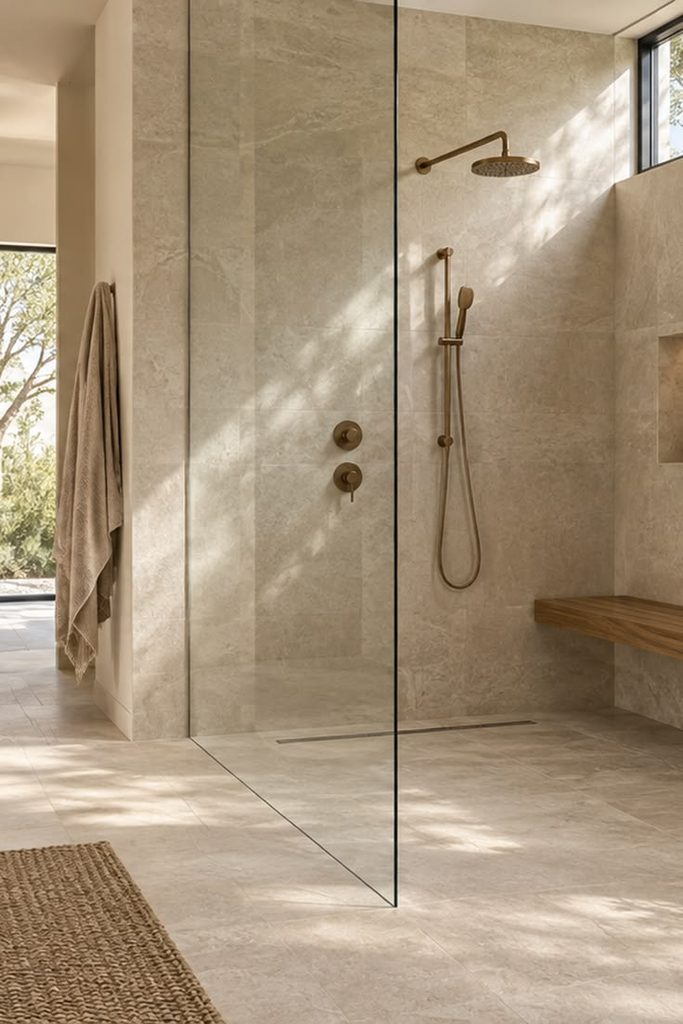
If you want the curbless shower to visually disappear into the room, start with the floor. Using the same tile from the main bathroom into the shower creates one uninterrupted surface, which is particularly useful in a small bathroom where every visual break makes the room feel more chopped up.
For a practical version of this look, consider a larger porcelain tile throughout the bathroom, then switch to a smaller coordinating tile inside the shower so the floor can slope properly toward the drain.
2. Use large-format tile on the shower walls
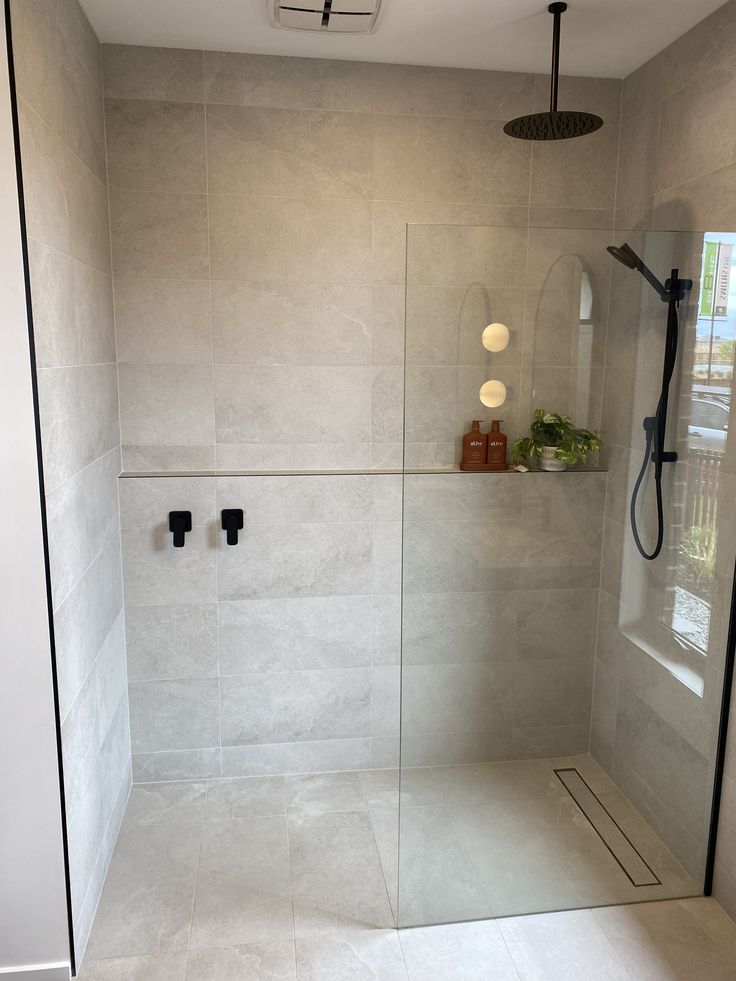
Large-format tile can completely change the look of a curbless shower because there are fewer grout lines interrupting the walls. Stone-look porcelain, for example, gives you broad stretches of material that make the shower feel more architectural.
This works particularly well when the shower wall is long enough to accommodate the tile without lots of awkward cuts around plumbing and corners. If your bathroom is small, measure the walls before ordering, the wrong tile size can leave you with tiny slivers at the edges that undermine the whole effect.
3. Add a small mosaic shower floor
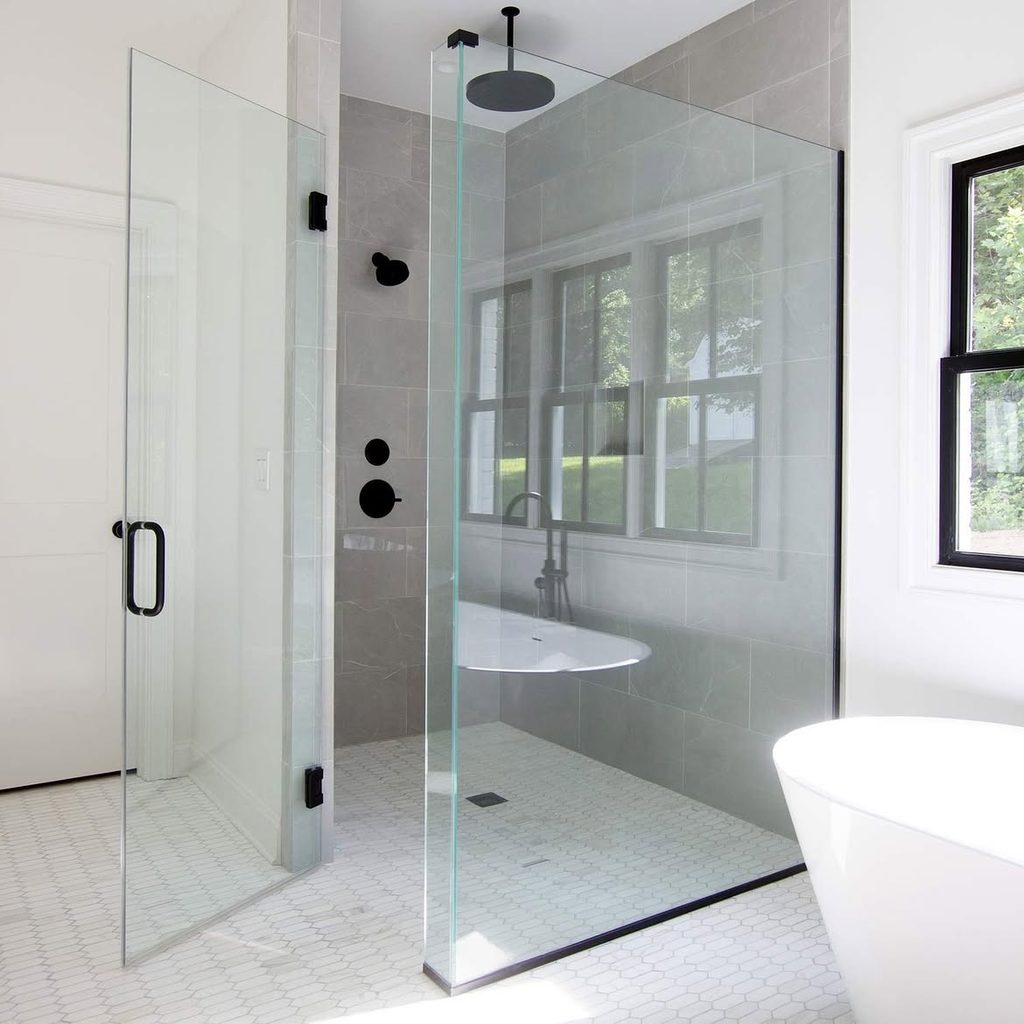
Here’s where a smaller tile actually makes sense rather than simply being a decorative choice.
A 2-by-2-inch square, hexagon, or penny tile gives the installer more grout joints to work with when creating the slope toward the drain. You can use that opportunity to introduce a slightly different color while keeping the rest of the shower restrained.
A cream bathroom with a slightly darker taupe mosaic floor is a good example. You get definition underfoot without creating a completely separate visual zone.
4. Put the linear drain against the back wall
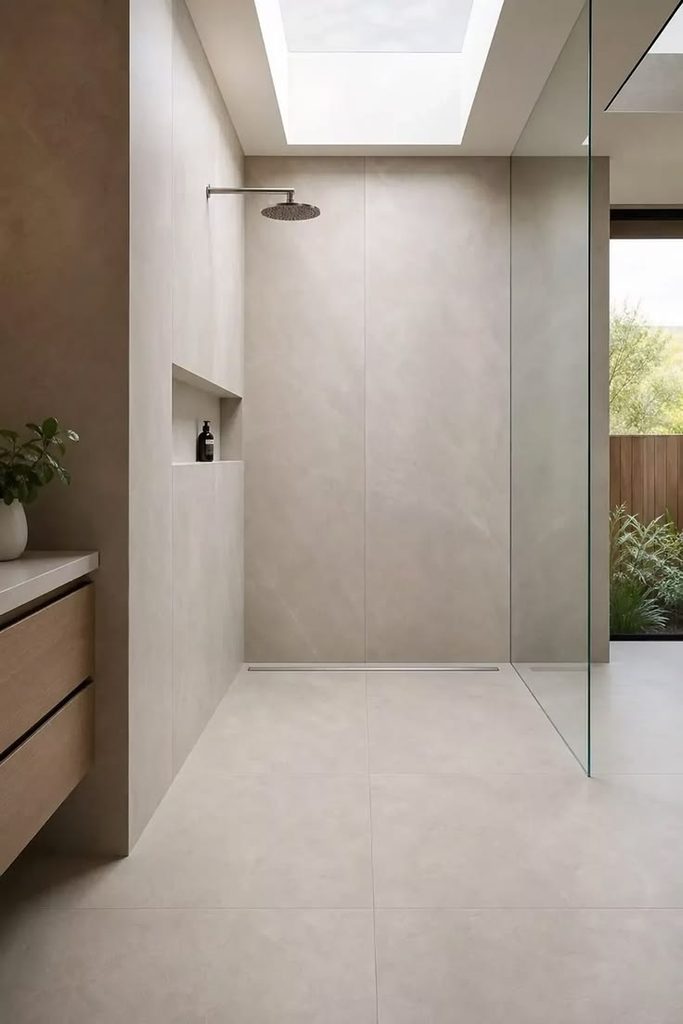
If you dislike the look of a drain sitting in the middle of the shower floor, move it to the back.
A linear drain running along the rear wall creates a much cleaner composition, particularly when the shower floor uses long rectangular tiles or a continuous stone surface. It also gives the shower floor a clear direction because the entire surface can slope toward one side.
This is something to discuss with the contractor before the floor is built, not after you’ve already chosen your tile.
5. Use a floating vanity to show more floor
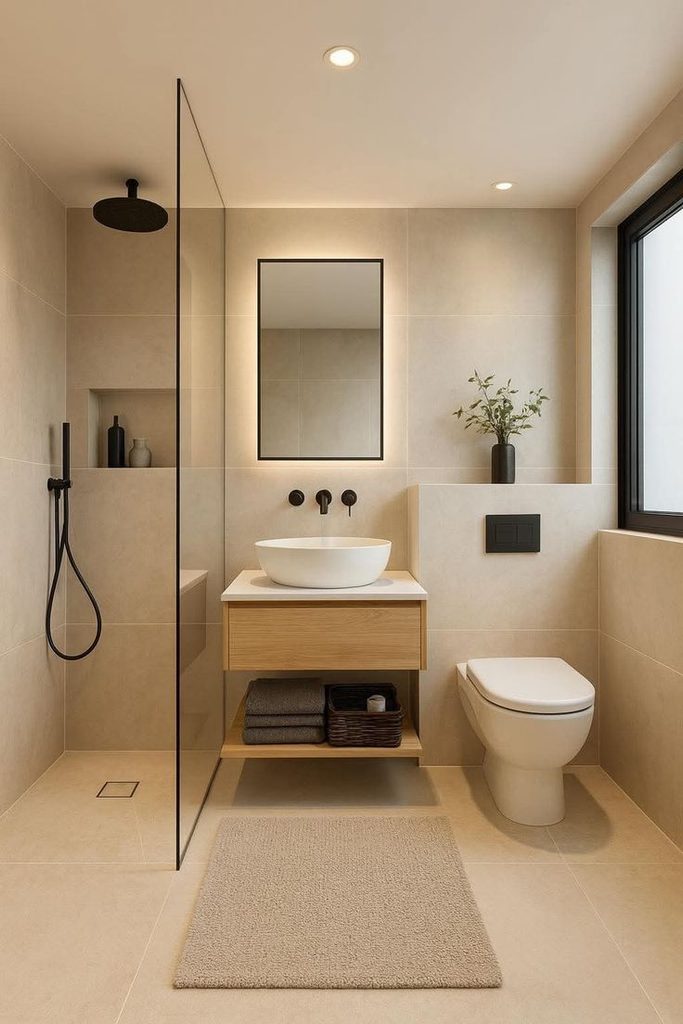
The floor is one of the stars of a curbless bathroom, so why hide half of it beneath a cabinet?
A wall-mounted vanity leaves the flooring visible underneath and helps the continuous floor treatment read across the room. It also makes the bathroom easier to clean because there is no cabinet sitting directly on the floor.
Pair it with a large mirror and wall-mounted lighting, and the entire vanity zone feels lighter.
6. Use one fixed glass panel instead of a full enclosure
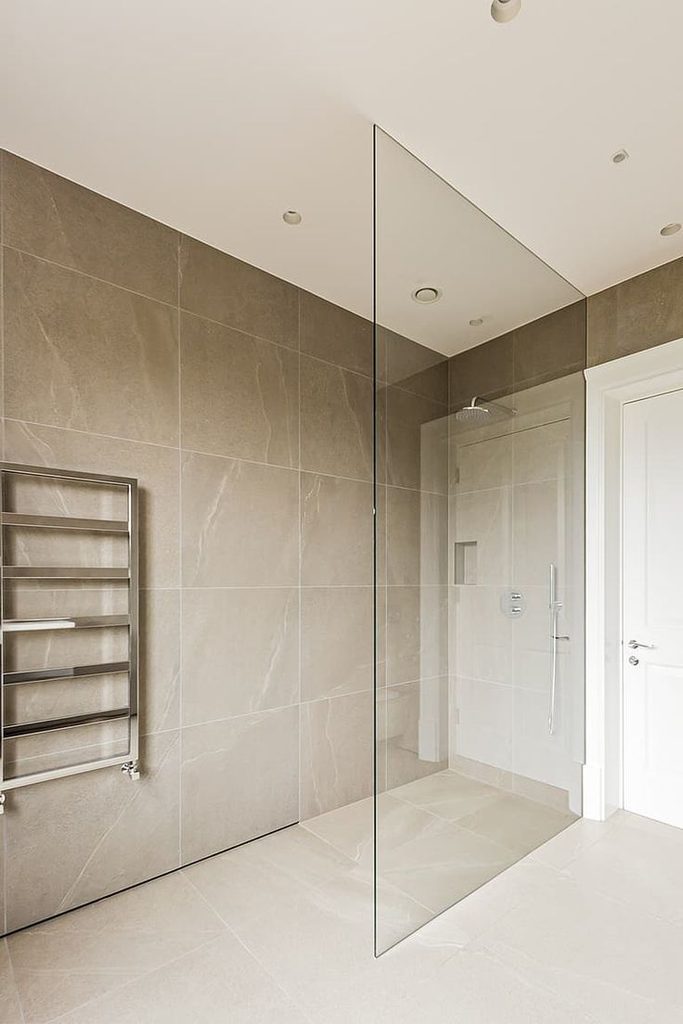
A single fixed glass panel can give you the open feeling of a curbless shower without surrounding the entire space with glass.
Place the panel beside the showerhead so it catches the main spray, then leave the entrance open. This works beautifully in longer bathrooms where you have enough distance between the showerhead and the opening to control splash.
7. Frame the glass in black
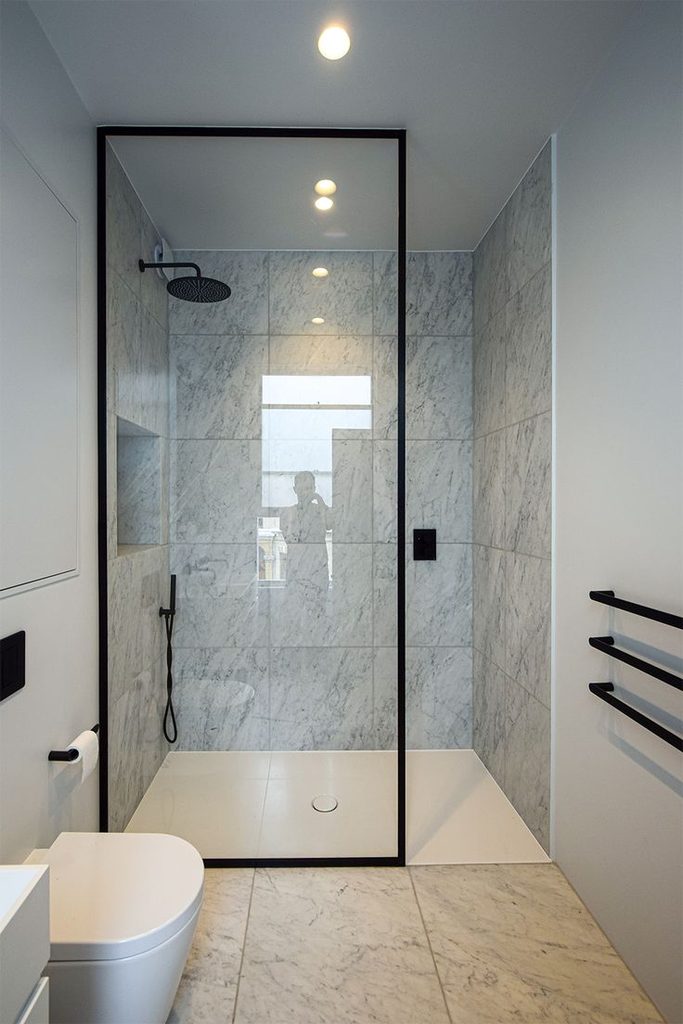
Black-framed glass is a particularly good choice when the bathroom needs stronger lines.
Try a fixed black-framed panel with white rectangular wall tile, a walnut vanity, and simple black fixtures. The result feels graphic and intentional without requiring patterned tile everywhere.
I’d keep the framing fairly simple. Once the glass has a strong grid, adding a busy tile pattern, elaborate lighting, and several decorative finishes can make the room feel visually crowded.
8. Use fluted glass for privacy
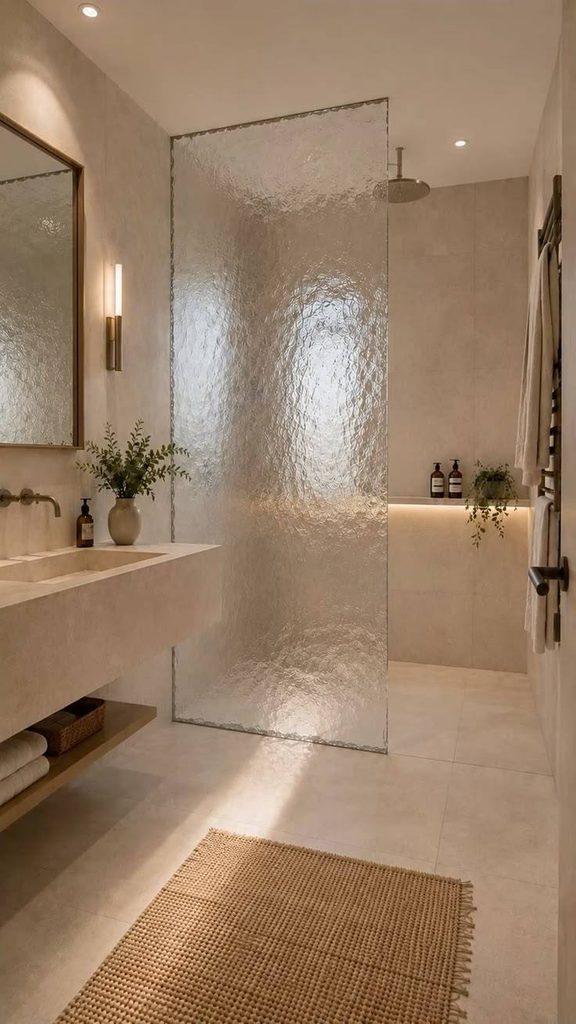
If your shower is beside the toilet, vanity, or a bedroom-facing window, clear glass may not be your favorite option.
Fluted or reeded glass gives you privacy while still allowing light to travel through the shower. It also adds texture without requiring another tile or decorative wall treatment.
A simple combination of fluted glass, warm stone tile, and brushed nickel hardware can be particularly beautiful if you want the bathroom to feel more residential than hotel-like.
9. Build a wide horizontal niche
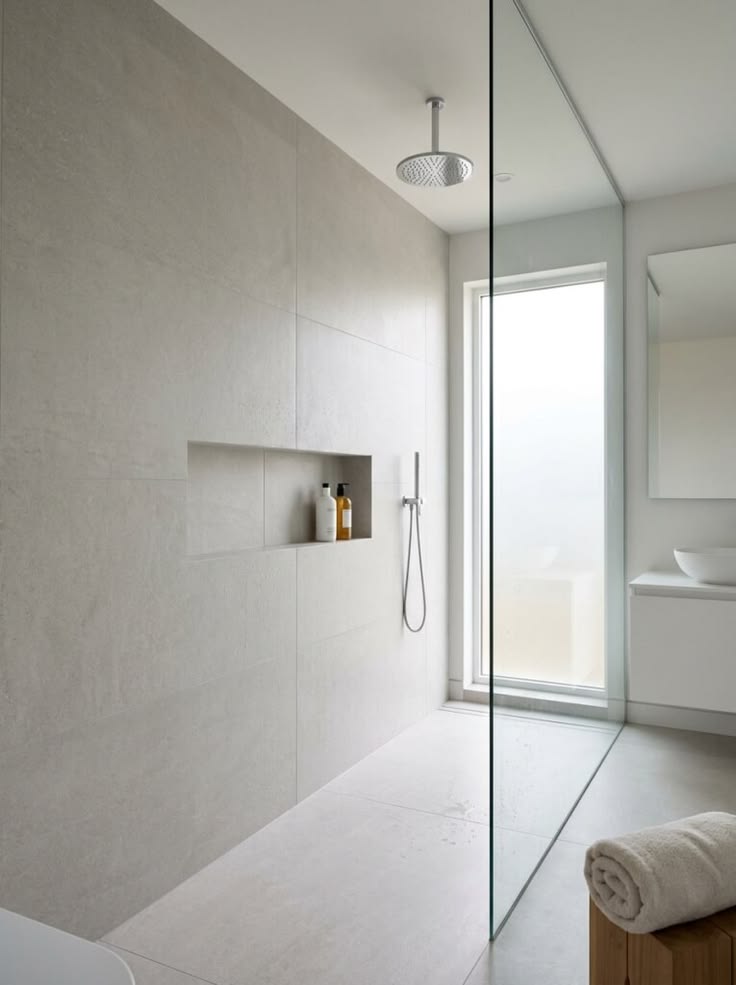
Forget the tiny niche that barely fits a bottle of shampoo.
If you have a long shower wall, build a horizontal niche with enough room for your everyday products. Around 12 inches high can be plenty for bottles, while the width can be adjusted to the wall and tile layout.
I like this approach because it looks intentional when the niche lines up with the surrounding grout pattern. If you’re using large-format tile, plan the niche before installation so the cuts don’t look squeezed around it.
10. Run the Shower Tile Behind the Mirror
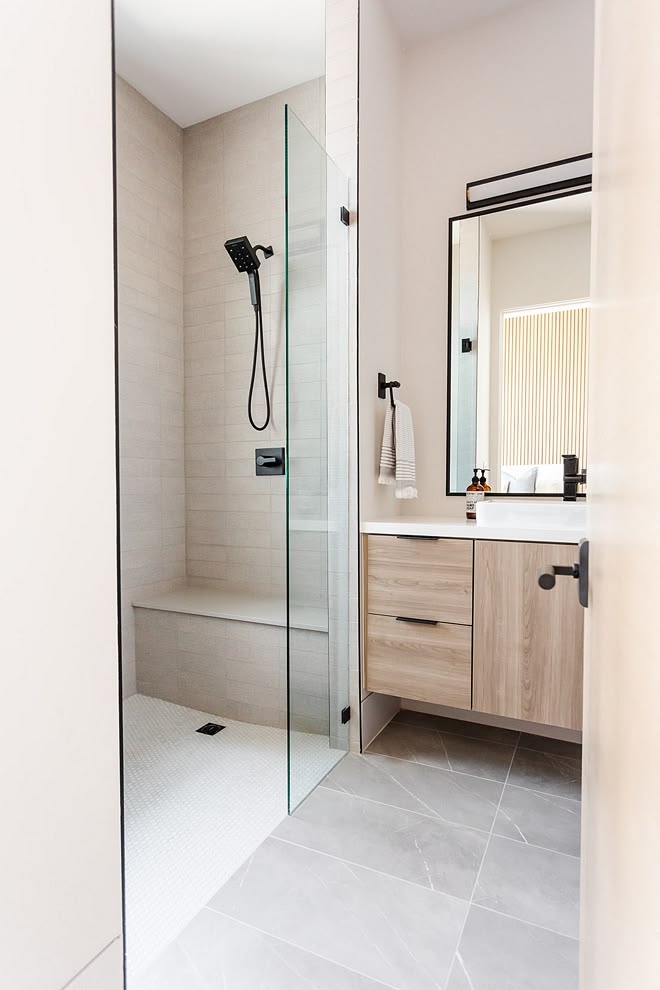
If your shower sits directly across from the vanity, consider carrying the same shower tile onto the wall behind the bathroom mirror. It creates a visual connection between the two sides of the room and makes the tile feel like part of the bathroom’s architecture.
A good way to do this is with a warm stone-look porcelain or a subtle handmade tile. Keep the vanity fairly simple so the tiled wall has room to stand out.
11. Add a floating bench in the same stone as the vanity
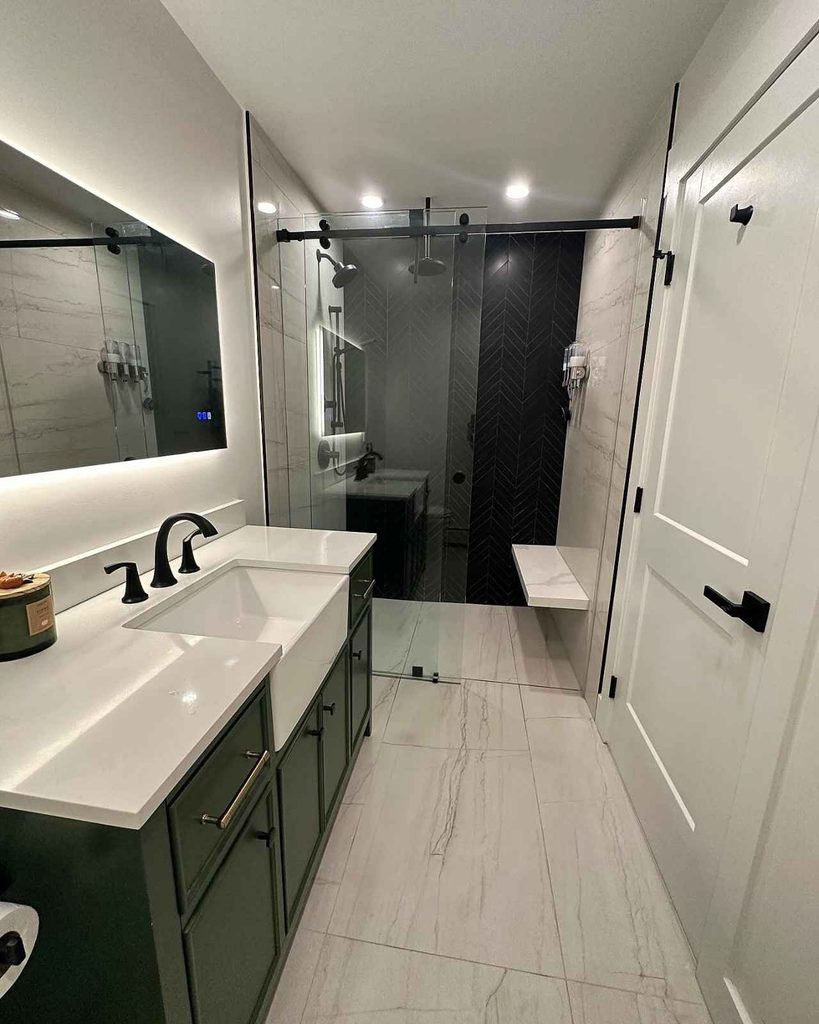
Instead of treating the shower bench as a separate feature, connect it to something already happening elsewhere in the room.
For example, use a walnut vanity with a warm beige quartz countertop, then carry that same quartz onto the floating shower bench. Suddenly the vanity and shower feel like parts of one design.
A bench around 16–18 inches high is a common starting point, but the final dimensions should be determined around the people actually using the bathroom.
12. Try a Dusty Blue Curbless Shower
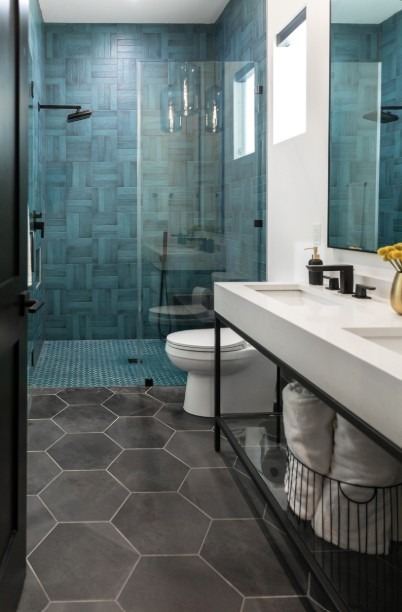
If you want color in the bathroom but don’t want to commit to an intense jewel tone, dusty blue is a really good middle ground. Think muted blue-gray tile rather than bright blue, the kind of shade that works with creamy white, pale oak, brushed nickel, or even a little warm brass.
I particularly like this palette for bathrooms with limited natural light. It gives the shower some personality while still leaving plenty of room for the room to feel bright.
13. Use vertical rectangular tile
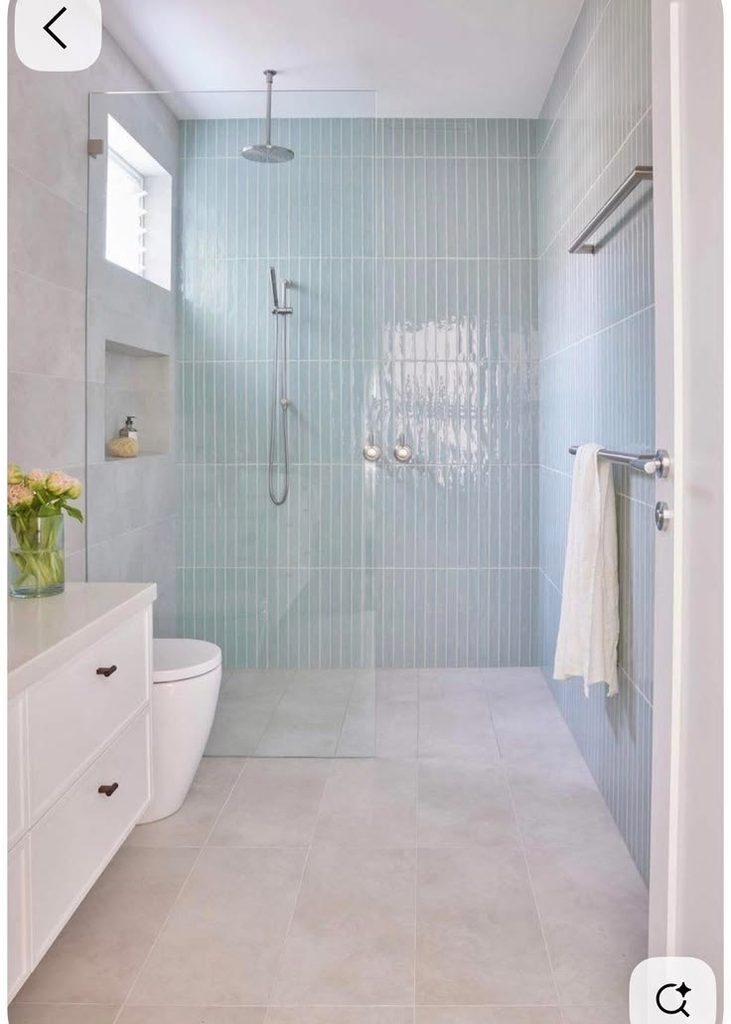
If your bathroom has a low ceiling, consider turning rectangular tile vertically.
A narrow tile installed vertically draws the eye upward and gives the shower a different rhythm from the usual horizontal arrangement. Pair it with a simple linear drain and minimal glass, and the vertical pattern becomes the main design detail.
This is also a relatively inexpensive way to make a standard tile feel more distinctive.
14. Try a Curbless Shower With a Built-In Tub
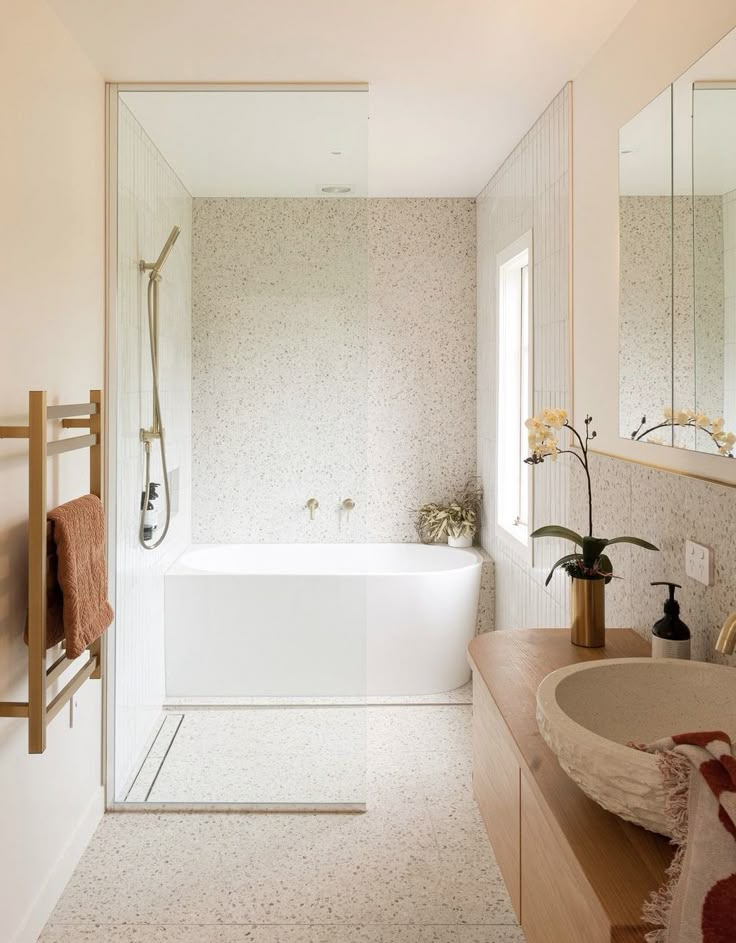
If you have a larger bathroom, you don’t necessarily have to choose between a bathtub and a walk-in shower.
A freestanding or built-in tub can sit directly beside the curbless shower, with the same floor material continuing underneath both.
This layout is especially beautiful when the tub and shower share a feature wall. It also gives you a reason to use the same stone or tile generously instead of chopping the room into separate finishes.
15. Use a Curved Shower Wall
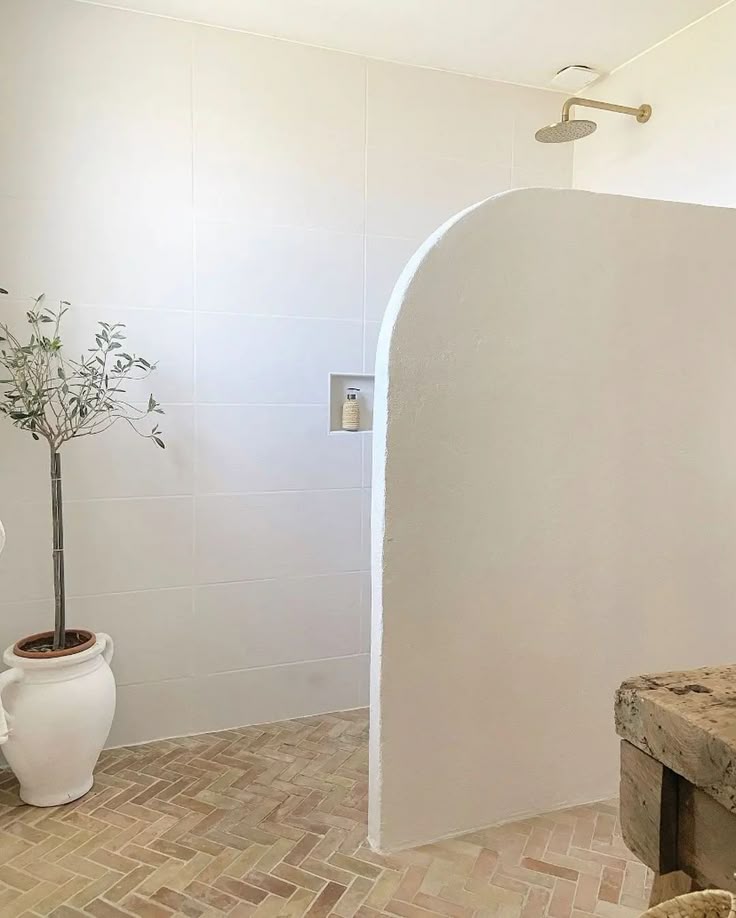
Want something that feels more architectural? Replace the standard straight shower wall with a gentle curved partition.
A curved plastered or tiled wall can define the wet area while creating a softer transition into the rest of the bathroom. You can leave the entrance open or add a curved glass panel depending on the layout.
This isn’t the cheapest idea on the list, but it is one of the few that can make a bathroom feel genuinely custom.
16. Use Terrazzo Throughout the Shower
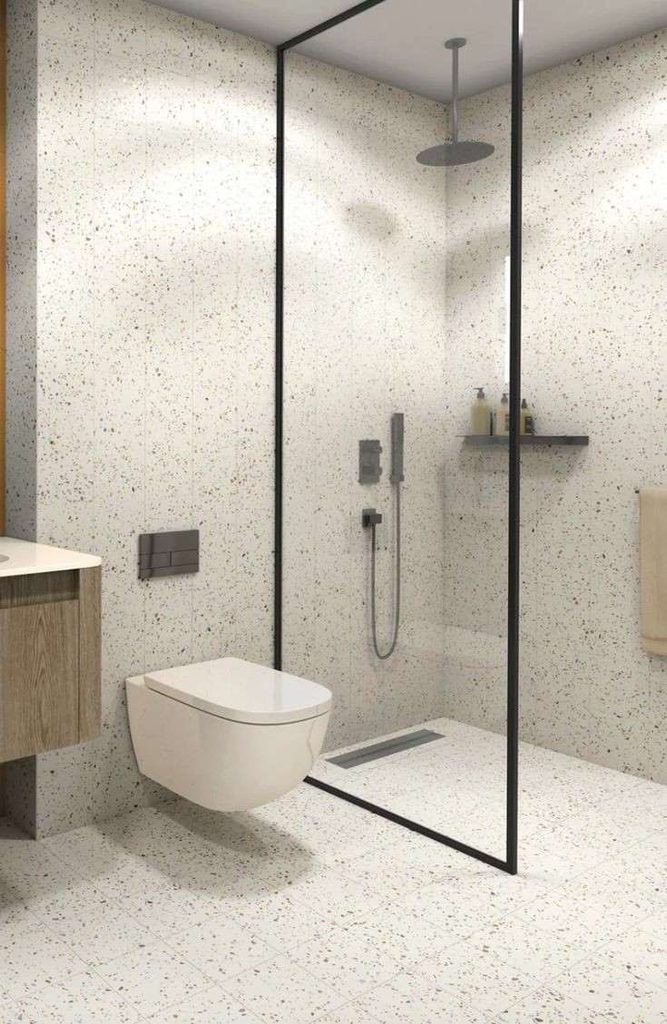
Terrazzo gives you something that plain stone-look tile doesn’t: built-in variation.
Choose a terrazzo with small chips in colors that already appear elsewhere in the bathroom, then use it across the shower floor and walls. You can pull one of those colors into the vanity, towels, or accessories rather than trying to coordinate every finish separately.
17. Create a Checkerboard Shower Floor
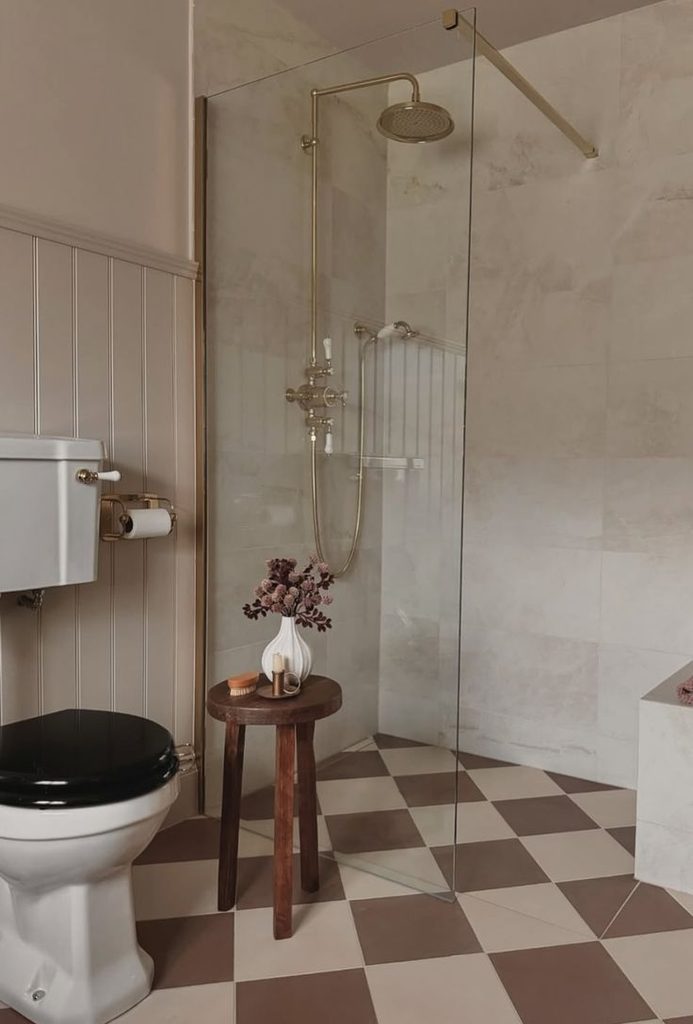
A checkerboard floor is one of those ideas that can completely change a simple shower.
Use small square tiles in two closely related tones, cream and taupe, white and charcoal, or beige and terracotta, rather than going straight for the highest possible contrast. The pattern adds character underfoot while allowing the walls to remain simple.
This is also a clever way to get a statement floor without buying expensive patterned tile.
18. Use a Curbless Shower With a Skylight
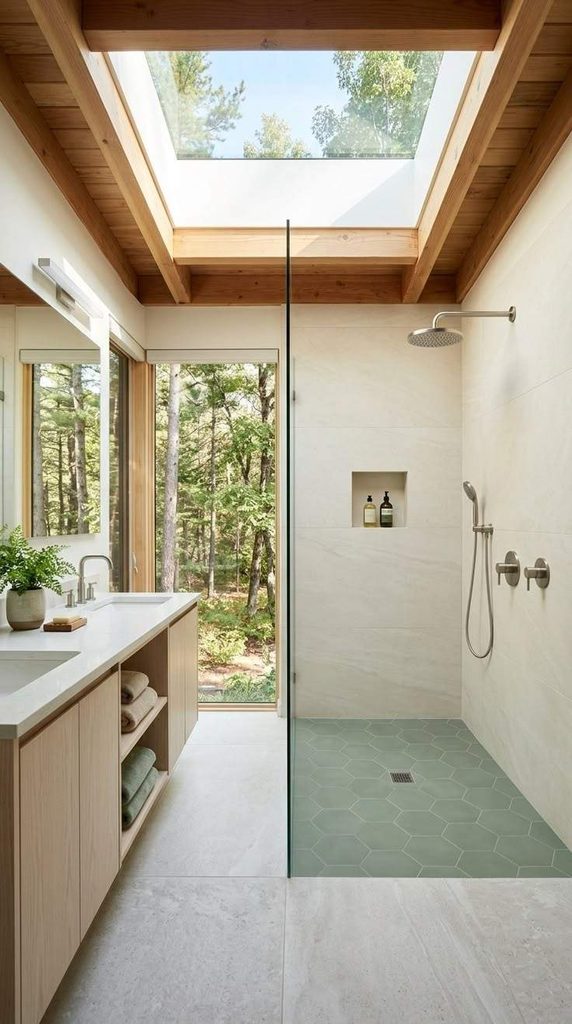
If the bathroom is on an upper floor and the structure allows for it, a skylight above the shower can completely change the experience.
Natural light coming from directly overhead makes the shower feel brighter and more open throughout the day. With a simple stone or plaster-like finish, you can let the changing daylight become the feature.
This is obviously a bigger renovation decision than changing tile, but if you’re already opening the ceiling or roof, I’d at least investigate the possibility.